Applies to BloodHound Enterprise only The Attack Paths page in BloodHound Enterprise surfaces findings — specific instances of vulnerabilities where a lower-privileged entity can gain access to a sensitive resource. Each finding includes prioritization data such as exposure and impact metrics to help you focus remediation efforts where they matter most. Not every finding requires immediate remediation. Risk acceptance lets you acknowledge a finding as a known risk that your organization has reviewed and chosen to retain for a certain amount of time. Use acceptance when:
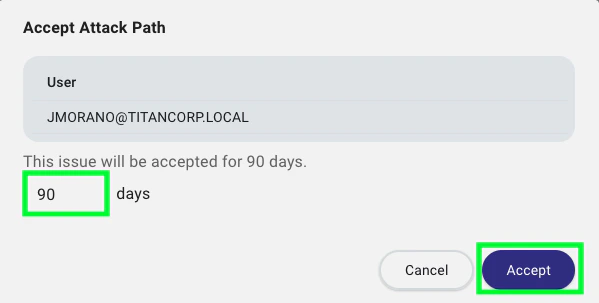
  • You have reviewed the risk and agreed to tolerate it for a defined period.
  • You are waiting for a change to complete, such as a retention window.
Accepting a finding records that the risk is known and temporarily tolerated. Acceptance is not a fix. To reduce risk, you must remediate the underlying condition.
Use remediation when:
  • You are ready to remove the risky condition.
  • You want posture trends to reflect actual risk reduction.

Accept a finding

Before accepting a finding, you must sign in to BloodHound Enterprise with a role that can accept attack path impacted principals. When you accept a finding principal:
  • It is excluded from posture calculations.
  • It is hidden from the default principal table view for that finding.
  • The principal and related edges still appear in other analysis views, including Explore and Posture.
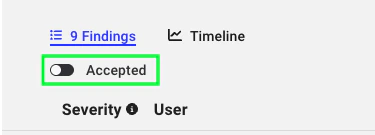
1

Open the Attack Paths page

In the left navigation menu, click Attack Paths.
2

Locate the finding

Expand the finding, open the menu to the left of the principal name (three vertical dots) and click Accept.
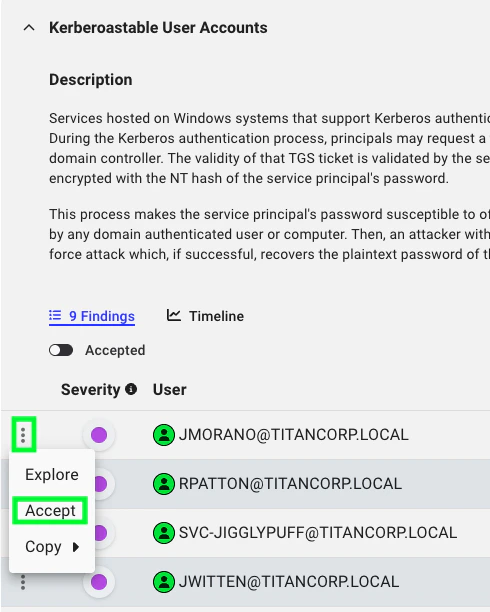
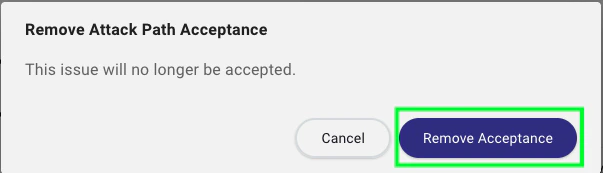
A view of an expanded finding that shows the accept option
3

Set acceptance duration

In the Accept Attack Path window, set the number of days for acceptance and click Accept.
If you are accepting a finding while you wait for data retention settings to delete the associated data, set the duration based on that scenario. For example, for Logons from Tier Zero Users, set the duration to 7 days.
A view of the accept attack path window that shows the duration setting

Remove acceptance

To remove acceptance for a principal:
1

Open the Attack Paths page

In the left navigation menu, click Attack Paths.
2

Locate the accepted principal

Expand the finding and enable the Accepted toggle.
A view of the attack paths page that shows the accepted toggle
3

Remove acceptance

Open the menu to the left of the accepted principal (three vertical dots), and click Remove Acceptance.
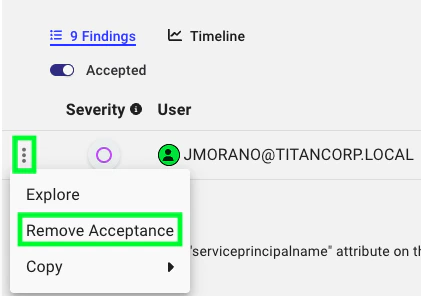
A view of the menu that appears when clicking the three vertical dots next to an accepted principal
4

Confirm removal

In the Remove Attack Path Acceptance window, select Remove Acceptance.
A view of the remove attack path acceptance window

Outcome

After acceptance, the principal is hidden from the default principal table for that finding until you enable the Accepted toggle. The principal and related edges remain visible in the Explore and Posture pages.
A view of a finding that shows the accepted toggle